Showing posts with label DIY. Show all posts

Monday, November 19, 2012

Pre-Thanksgiving Fun

Since we've been studying pilgrims, I thought a good activity for the last Fun Friday of the year would be to make butter.  I got 2 containers with screw-on lids (put tape on the lids b/c they crack from the marble), 1 16oz container of heavy whipping cream, and 2 marbles.  I used the big marble and it cracked both lids so you can use a smaller one or do without.  The marble makes it churn quicker and we were running out of time.  Then I poured half the whipping cream into each container, added a marble, screwed the lid on TIGHT, and handed them to the 2 groups I had in a circle.  Next they started shaking to the chant "Shake, shake, shake...shake, shake, shake...shake the butter, shake the butter...pass".  They would pass it to the next child and we'd start all over again.  It took about 20 passes (less than 5 minutes)before I realized I couldn't really hear the cream or the marble anymore.  We opened the containers and we had whipped butter!  I probably should've continued to shake the containers more but like I said the lids were cracking from the marble and the butter was set up enough to spread.  I spread them on slices of bread and the kids were amazed and in awe at what we had just done!  Next year I'll know to use a smaller marble and put duct tape on the lids first.

Shake Shake Shake..Shake Shake Shake

Shake the butter, Shake the butter

Pass it

whipped butter--yum!  It didn't even need salt.

Kids enjoying the fruits of their labor.

Wednesday, June 20, 2012

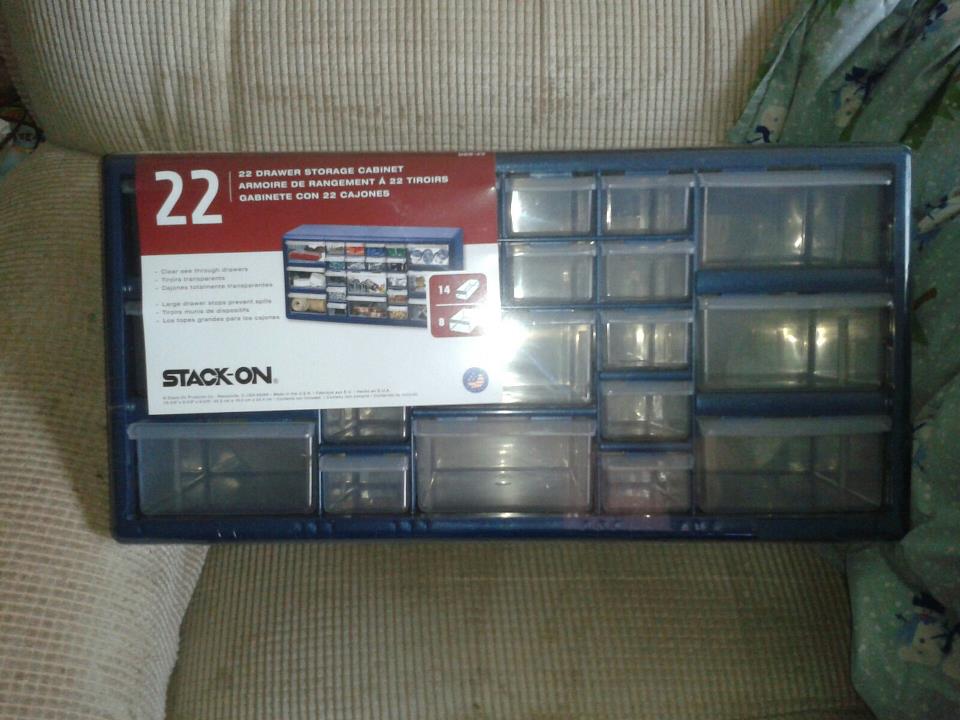
My finished organizer!!!

The last time I posted, I included a link to the blog where I got the AWESOME idea for an organizer.  I'm telling ya--whoever created this thing is a GENIUS!!  Of course I IMMEDIATELY ran out to Lowe's and bought the base, got some adhesive border papers from Michael's and pulled some bright color paper from my stash at home.  I couldn't decide how I wanted the color scheme to go so I just printed out 2 sets of labels.  Then I played around with how I wanted the color scheme to look before I taped the labels onto the front of the drawers.  Last I added the borders and voila!  I know have a really cute organizer!!!

This is the base of the organizer.
Added the labels in the color scheme I chose


Added some adhesive borders and voila!


Monday, June 18, 2012

Found this great DIY organizer and am in the process of making it.  It's super simple so far.  Here's the link to the blogger: Teacher Toolbox.  I've got one more step and then I'll post pics of the finished project.  I think my coworkers are going to be JEALOUS!!!!  :)

Sunday, May 6, 2012

DIY word wall

My newly built classroom did not come with any bulletin boards!  I mean seriously, who designs these rooms!  I took matters into my own hands and made my own bulletin board for both my calendar area AND my word wall.  I used foam core sheets I got at Dollar Tree, wrapping paper from Walmart, and glue dots from a craft store.  I also got some cool ribbon from Michael's when they put it on sale to use as dividers.

First I decided on how many sheets of foam core board to use.  I chose 8 because you can easily divide it into 3 parts each for 24 parts.  I double-up W/X and Y/Z.  Then I wrapped the boards in wrapping paper like I would a package.  Then I added glue dots--3 on the short side of the board and 6 on the long side.  I lined up the boards with the seam on my walls and pressed them into place.  Next I took the ribbon I had found and covered up the seams, top, bottom, and sides of the boards.  Last I took a smaller ribbon and divided the boards into thirds then added letters I had found on a blog.  And voila--instant, very cute, wordwall!!!

I stapled words onto it as we added them.  Since I had made the word wall myself, I was able to hang it at a level where the children could truly interact with it.  It has stood up the whole year despite several temper tantrums involving desks, chairs, and little bodies being tossed against it.  The only thing I've had to redo was to restaple the ribbon a few times when that occurred.